How to...
Synchronize data with Dropbox synchronization widget
Initially: Please download the latest TrainingLabPro test version from our server and call the setup to install the TrainingLabPro application on your PC
TrainingLab Pro Setup
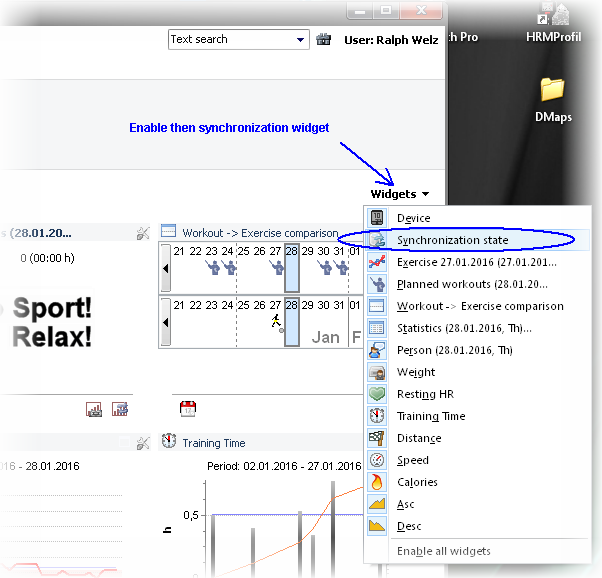
Step 1: Enable the synchronize widget if it isn't enabled at the favorites view
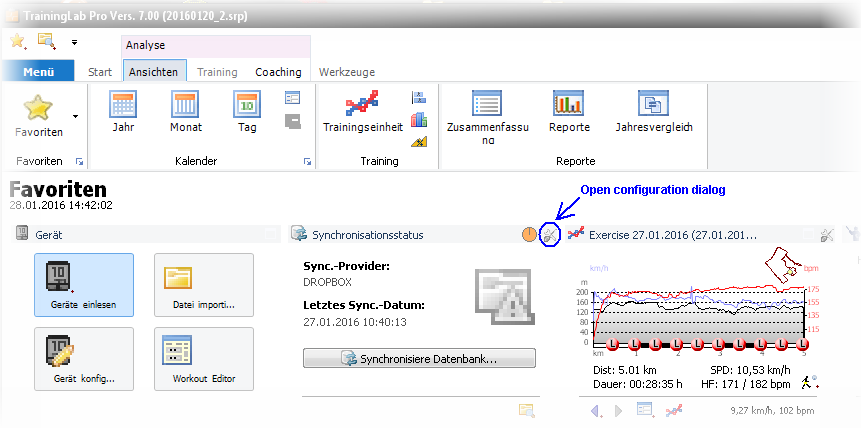
Step 2: Call the synchronization configuration dialog
(NOTE: the configuration dialog will be opened automatically if no sync provider has been assigned
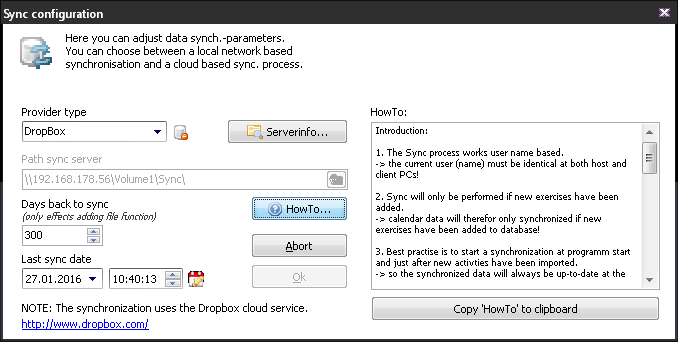
Step 3: Choose Dropbox as your preferred sync-provider
Step 4: Start the synchronization process by clicking the SYNCHRONIZE button on the sync.-widget
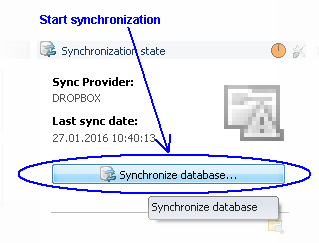
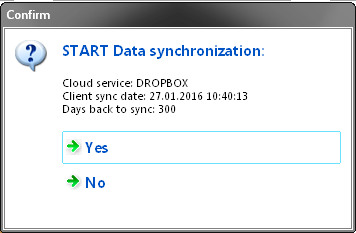
Step 5: Confirm!
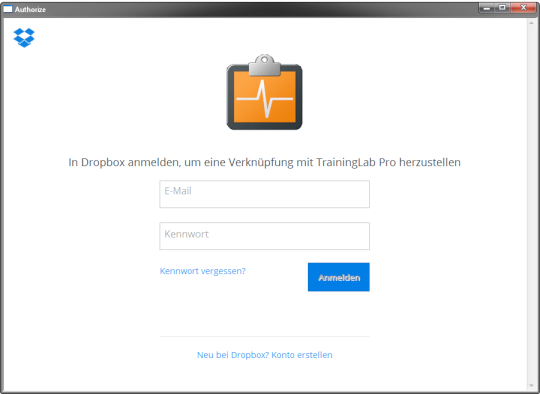
Step 6: The first time you synchr. your data with the cloud service you must authorize the TrainingLabPro application
(NOTE: TraningLabPro needs some rudimentarily permissions, otherwise the Dropbox cloud service cannot be used!)
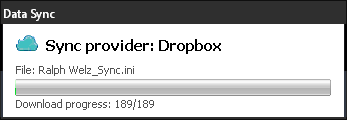
Step 7: Now the synchronization starts...
-> new added training data on your PC will be uploaded to the dropbox cloud storage
-> missing data will be downloaded from dropbox cloud storage to your local PC
(NOTE: all your data will be stored to a folder called Apps/TrainingLab Pro at your Dropbox cloud storage
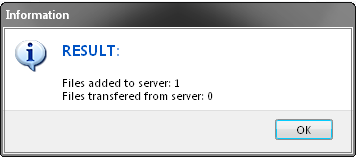
Step 8: Finally a short status report will be shown